|
5.13 Cineractives This section will teach you the basics of setting up a cineractive for your mission. As an example, we'll look at the mid-mission cineractive from J03 that happens immediately after the first objective is completed. You will find the scripting end of it in the action condition of the "objective_destroy_shuttle" script. And you'll find the camera paths and all other resources by opening J03 in the mission editor. Setting up Camera Paths Shot 1 Looking at the J03 mission in the editor, hit 7 on the keyboard to get to the camera paths and find the path called "caravan". Double-click on the "caravan" path to call it up, then scroll to the upper-middle region of the map. You should be looking at a very simple camera path near a cluster of Sprawler units. This is the first shot in the sequence.
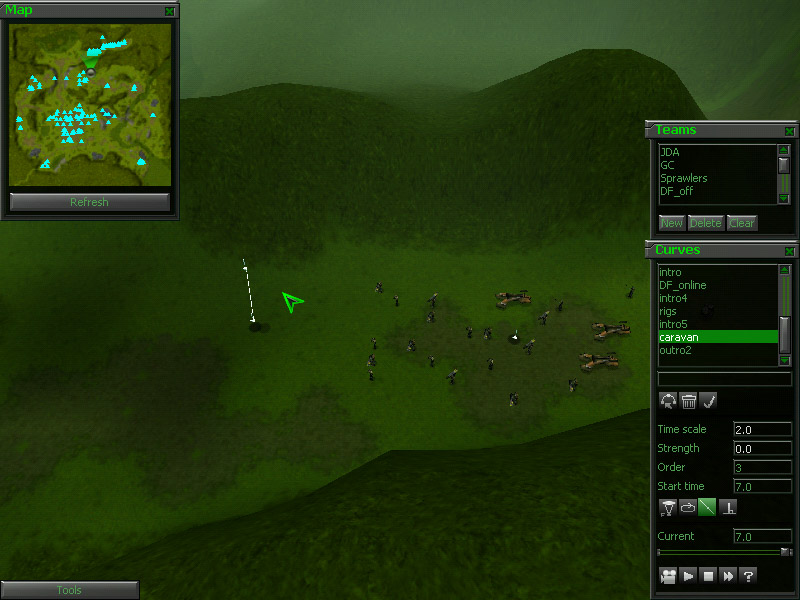 Click on the camera in the bottom left corner of the camera tool, then click the play button next to it. You should see a 7 second movie that starts low to the ground, then pans up over the Sprawler units. You'll notice that none of the units are moving like they are in the mission. We'll get to that.
 Click the camera buttons again to get off the camera path and look at it from a side view. You'll see 3 distinct 3D arrow-like objects with a white line connecting 2 of them. These are the nodes of the path. There are actually 5 nodes on this path, 4 of them are sharing 2 pairs of coordinates. 3 of the nodes are for the camera movement and 2 are for the focal point of the camera. Click on the node that is low to the ground with the white line extending up from it. Select and move it in any direction. You will see that there is another node directly underneath it. Hit ctrl-z to undo the move and get the nodes back on top of each other.
Naming the Path
Laying Down Camera Nodes
 Grab the first node you laid down and drag it to roughly where you want the path to start. If you want to go back to the original path to compare, you'll have to save this one, so click the check mark button with the tool tip of "Apply changes to curve". That saves what you've got so far. Now you can double-click on the "caravan" path to see where its nodes were positioned. Once you've got the x and y of the first node positioned, hold down the shift key and drag it again to move it up. Nodes are always created directly on the terrain surface, so you want to drag them up at least a little from their starting points to keep them from cutting through the ground. When you're done with that, skip ahead to the 3rd and last node in the path. Ignore the 2nd node for now, we'll deal with that in the "objects.cfg". Move the 3rd node to a position near the 1st but slightly forward, then hold down shift and drag it straight up so that it will overlook the Sprawler forces.
Laying Down Focus Nodes
Setting Strength and Time
Viewing the Path in Progress The 2nd nodes on both the camera and focus paths are not in the right places. We want them to share the exact coordinates of the nodes that precede them. It is almost impossible to do this using the editor. Instead we must resort to text files. Save your work under a new file name. Call it J03_tutorial if you want. Then alt-tab out to the desktop if you can. If you can't alt-tab, you'll have to quit out and load the game back up when you're done. If you're forced to do this�I pray for you. THIS NEXT PART IS VERY IMPORTANT!!! Most of this stuff you can figure out with a little persistence. But copying node coordinates cannot be done in the editor or the script, and is very tricky to learn on your own. So read this next part carefully to learn a very useful trick.
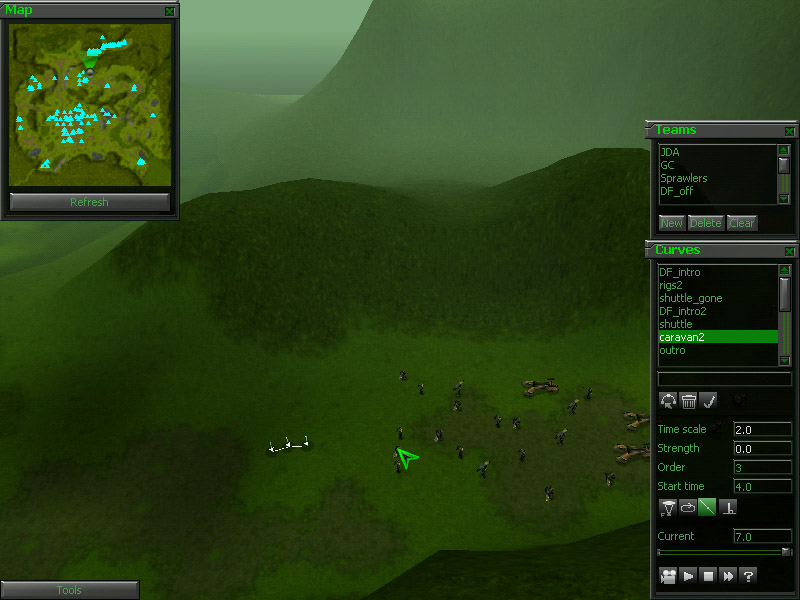
Copying Node Coordinates With the "objects.cfg" open, do a search for the string "caravan2". This should take you straight to the data for the camera path you just made. You will see a string of matrix grids with numbers in them. These are the coordinates for each node, listed in the order that they occur on the path. The numbers listed next to "Pos" are the x, y and z position coordinates. The other 3 listings are for vector orienation. The whole thing should look roughly like this (most of the nodes were removed to save space): CreateObject("Bookmark", 1890) Using this file, getting nodes to share coordinates is very simple. All you have to do is copy the coordinates from one node and paste them over the coordinates for the other. That's all there is to it. You can also edit node strengths and times here, as well as manually tweaking x, y and z coordinates. Grab the coordinates of the first node listed under "Movement" and copy it into the second node. Then do the same for the nodes listed under "Focus". Save this file and go back into the editor and reload the mission. DO NOT SAVE BEFORE RELOADING THE MISSION. If you do, you'll lose the changes you just made to the text document. Once it's reloaded, view the caravan2 path again. you should get something very similar to the original "caravan" path. Make any adjustments you feel necessary to the node points until you are happy with it. If you want to copy the node positions exactly from the original "caravan" path, you now know how to do that using "objects.cfg". That's it. We're done with the first shot. Now we'll go through the 2nd, 3rd and 4th shots quickly. They all use the same basic techniques, but will add a couple new tricks here and there.
The next shot uses the path called "DF_intro". Double-click on the name to call it up, then scroll a little to the west on the mini-map to find it.
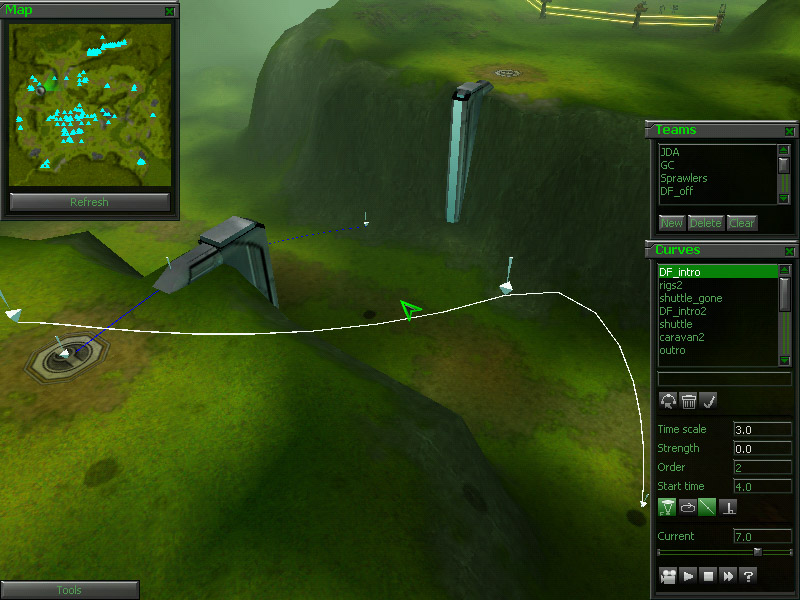 This shot has 8 nodes; 4 for the camera and 4 for the focus. You'll notice that one of the lines is colored blue. This is the focus line, and helps distinguish between the two. You'll also notice that this path uses a lot of curves. These are very important for making your cineractives look good.
Curve Strength and Normals Strength not only affects the degree to which a curve bends, it also distorts the speed at which the camera or focal point moves. The lower the number, the more the camera/focus will slow down when it is near the node and speed up when it is between nodes. If you raise the strength very high, the camera/focus will speed through the node very quickly. Look at the settings on the existing camera paths to get a feel for how this is done. To get a feel for the speed at which the camera/focus is going to move, click the button with the tool tip that says "Draw normals". You'll find it in the same row as the "Loop" and "Edit focus curve" buttons. This will divide the interval between each node into tenths and show you how the camera/focus will speed up and decelerate as it moves. Watch this camera path a couple times to get a feel for how curve strength works. Also notice how the focal point moves smoothly in relation to the camera. Shot 3 Simple is Good Go to the camera path labeled "DF_intro2". It is very close to "DF_intro", on the other side of the ravine. This is a very simple but effective shot. It has only 3 nodes each for both the camera and focus, and it has all its strengths set to 0. When viewed in the mission, it synchs with the VO to communicate the idea that powering up the Death Field will block passage through the ravine. Very often, these simple shots are best for communicating what needs to be done in a mission. Shot 4
Blending Cineractives into Gameplay
|